Getting Started with the Microsoft Bot Framework (Part 2)

Part 1 of this series is here.
In the previous post, we looked at a couple of use cases where bots may come in handy in addition to taking the initial steps of getting up and running with the emulator.
In this post, we'll lay out our scenario in a bit more detail and begin to build out some of the features.
User Experience
Looking back at part 1, the goal of our bot is to allow patients to check their appointments via a messaging service (e.g. Skype, text, etc.). This will allow the receptionist to focus on other duties while the bot handles the repetitive and straightforward (in our small world demo) tasks.
We'll assume that the user was given a specific number to text via some promotional marketing offered up by the clinic:

So here's how we envision an exchange to take place:
- A first time user sends a message to the number that they have for our bot. We'll assume they text a greeting, like "Hi".
- Our bot will receive the message and respond to the user with a greeting and a brief description of what it can do, along with a sample command.
- The user will try that command and the bot will interpret it and respond.
The first command we'll implement is "check appointment": the bot will recognize the user and check to see if they have an appointment. If they do, it will return the appointment date, time, and who they are scheduled to see.
Bootstrapping the Existing Schedule System
For our scenario, we have an existing schedule system that our bot is going to interface with. You can see the full project on Github, but we'll go over the highlights here briefly for context. For this demo, we'll whip up a quick scheduling "system" to act as the existing system our bot will use.
The database will look something like this:
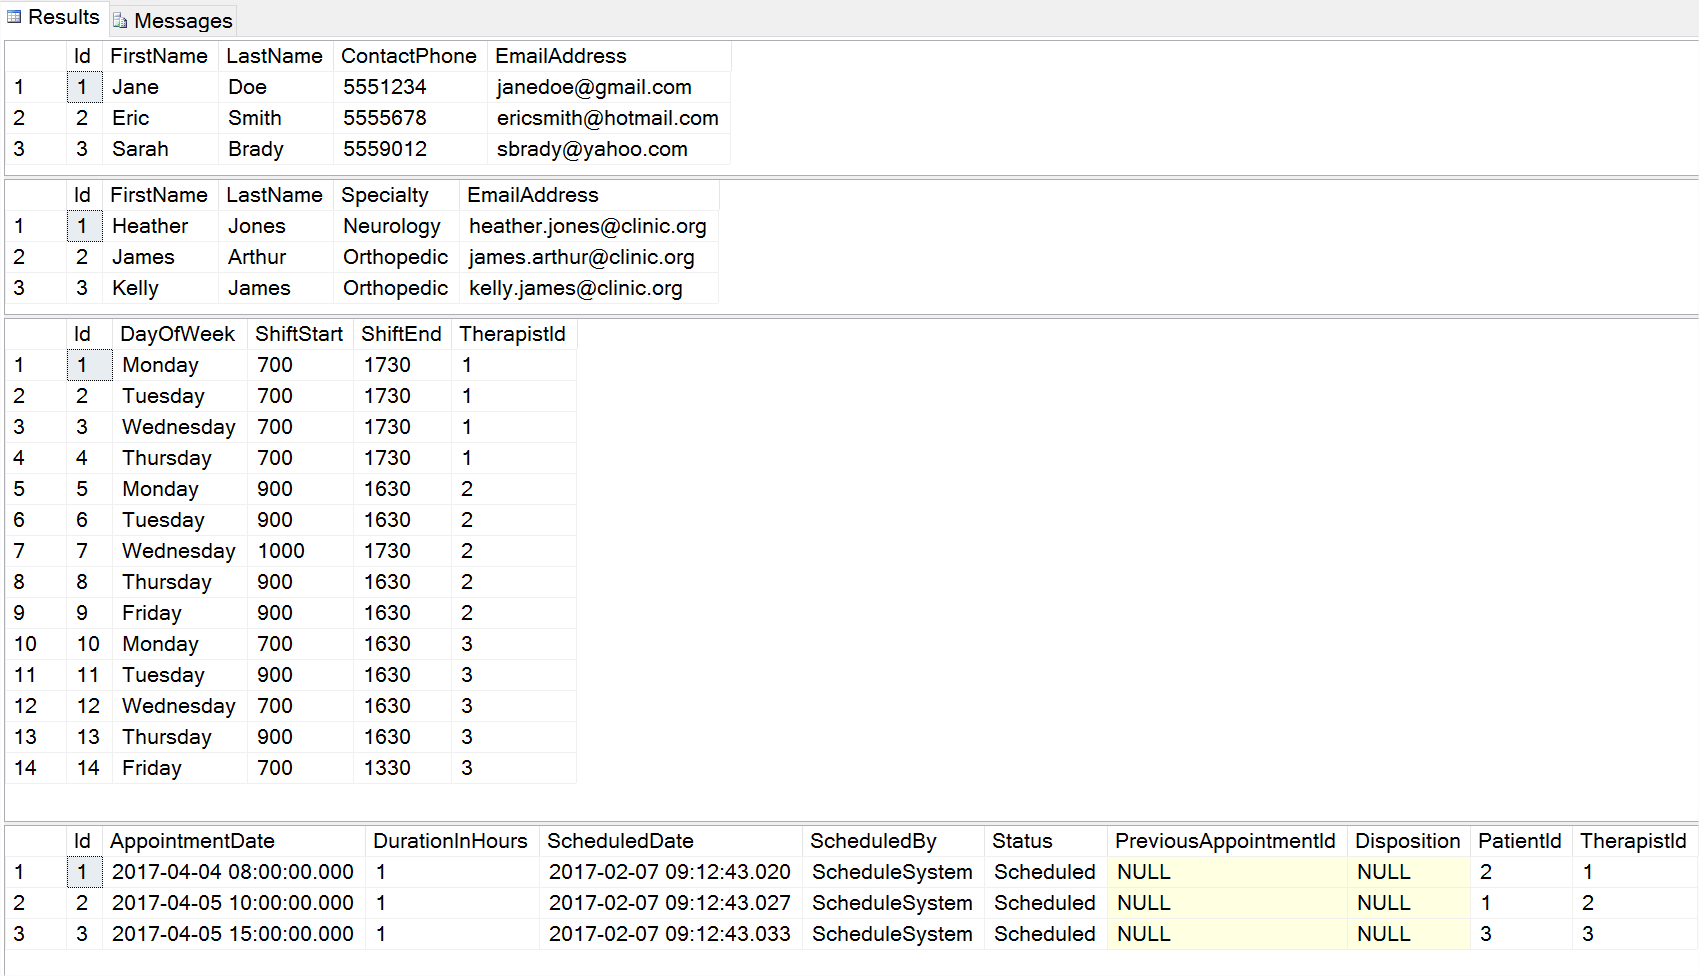
The business rules and access to the data will be managed by a RESTful API. For our purposes, this will be a Web API 2 project that will expose the following routes:
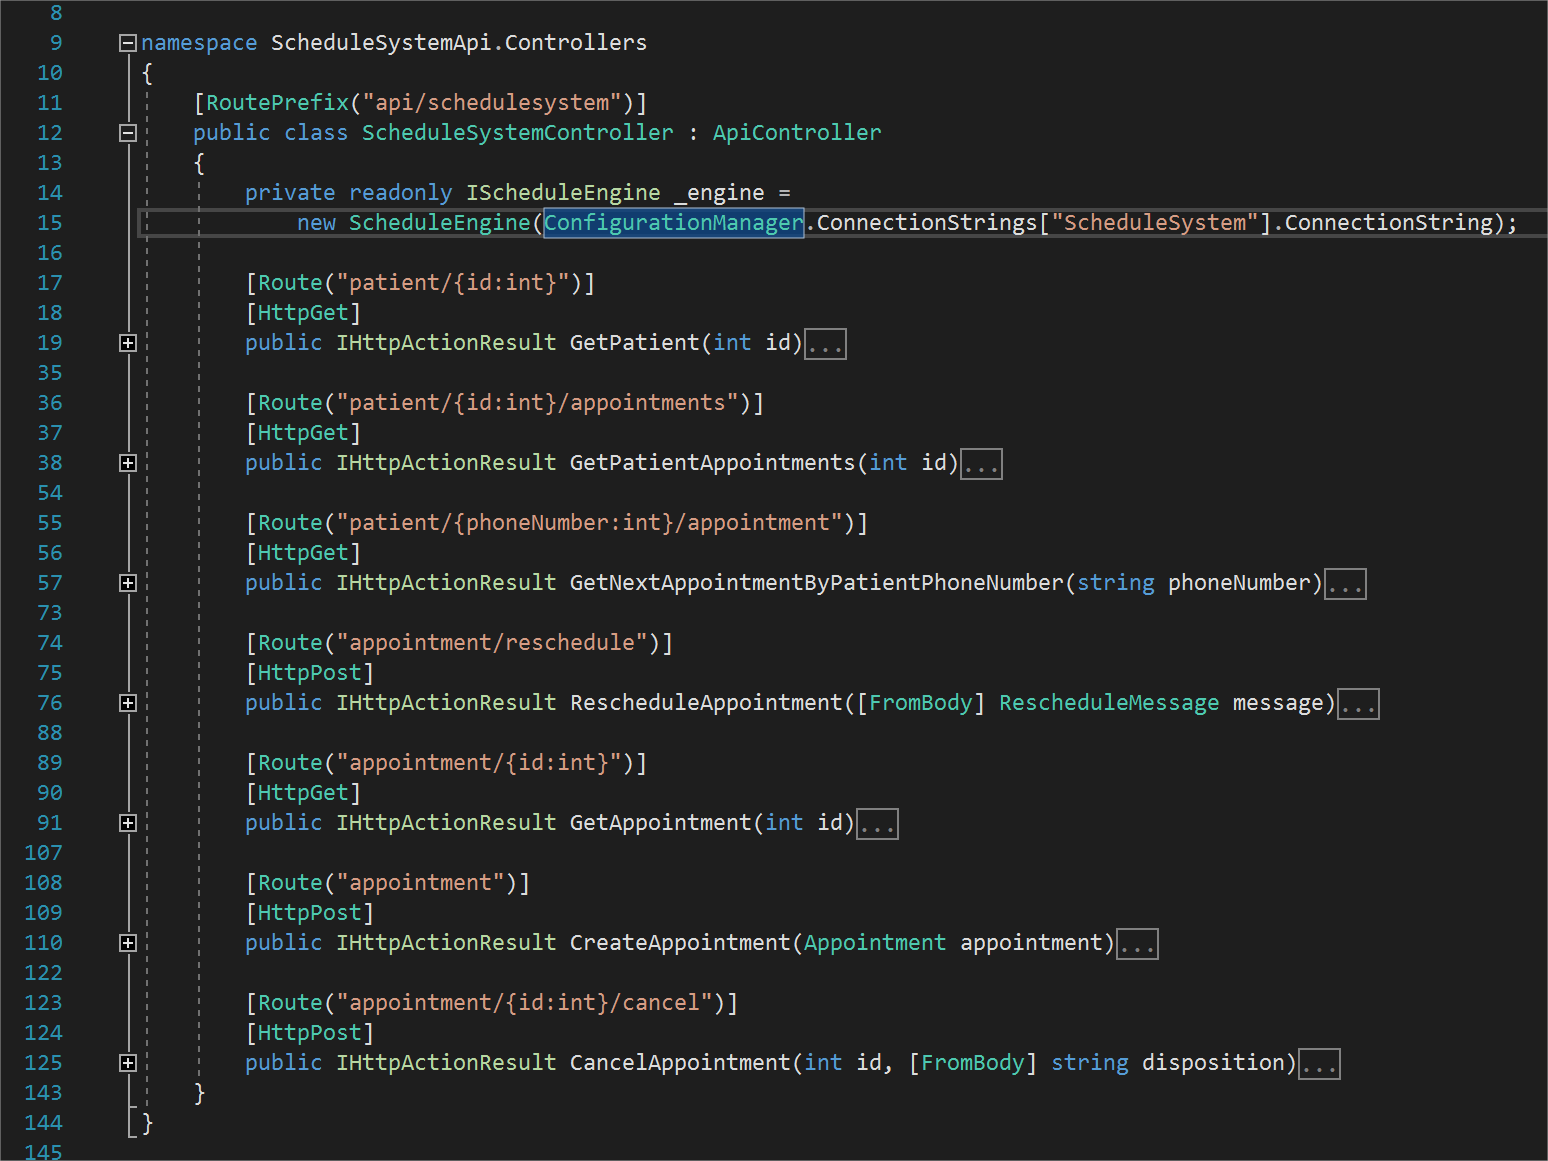
Easy enough.
Back to the Bot: Dialogs
Ok, so we have a decent idea of what the existing schedule system looks like and we have a rough idea of what the user experience should be. So let's look at how we'll accomplish that.
The Microsoft Bot Framework provides a construct known as a "dialog". The dialog has an interface of IDialog<object> and is used to model the conversational process between a user and a bot. Dialogs are capable of maintaining their own state and you can compose dialogs with other dialogs (which we'll see in our own example later on). This is useful when you want to maintain a value or set of values throughout a conversation or you need to branch your dialog off to another set of dialogs.
The IDialogContext maintains a dialog stack so that the framework knows where a user is at within the conversation. In code, you can use the context to indicate when a particular dialog is complete (popping it) or when you need continue on to another dialog (pushing it).
We'll illustrate these concepts a little further on, but let's touch briefly on a particular type of dialog, the LuisDialog<object>.
Using the LuisDialog in Conversations
The LuisDialog is a special dialog that is used to integrate with Microsoft's language understanding and intelligence service (LUIS). Currently free while in beta, it allows you to build a language model using artificial intelligence. Since this is a service, you can build, train, and deploy your model completely independent of your bot, giving you the flexibility to make changes to your bot and/or your language model independent of each other. Of course, this means that your bot will have to have connectivity to get to the service; if the service is down or your bot has connectivity issues, you won't be able to interpret the user's response (unless you code for that yourself).
For our implementation, we'll have a couple of simple intents that will be used to interpret the user's request. But first, let's start putting everything together.
Putting it Together
Let's go ahead and give our bot the ability to respond to a user's inquiry to check their appointment time.
First, let's navigate to LUIS, create a free account, and put together an app. Call it whatever you like, but for demo purposes I called it "ScheduleChatBot".
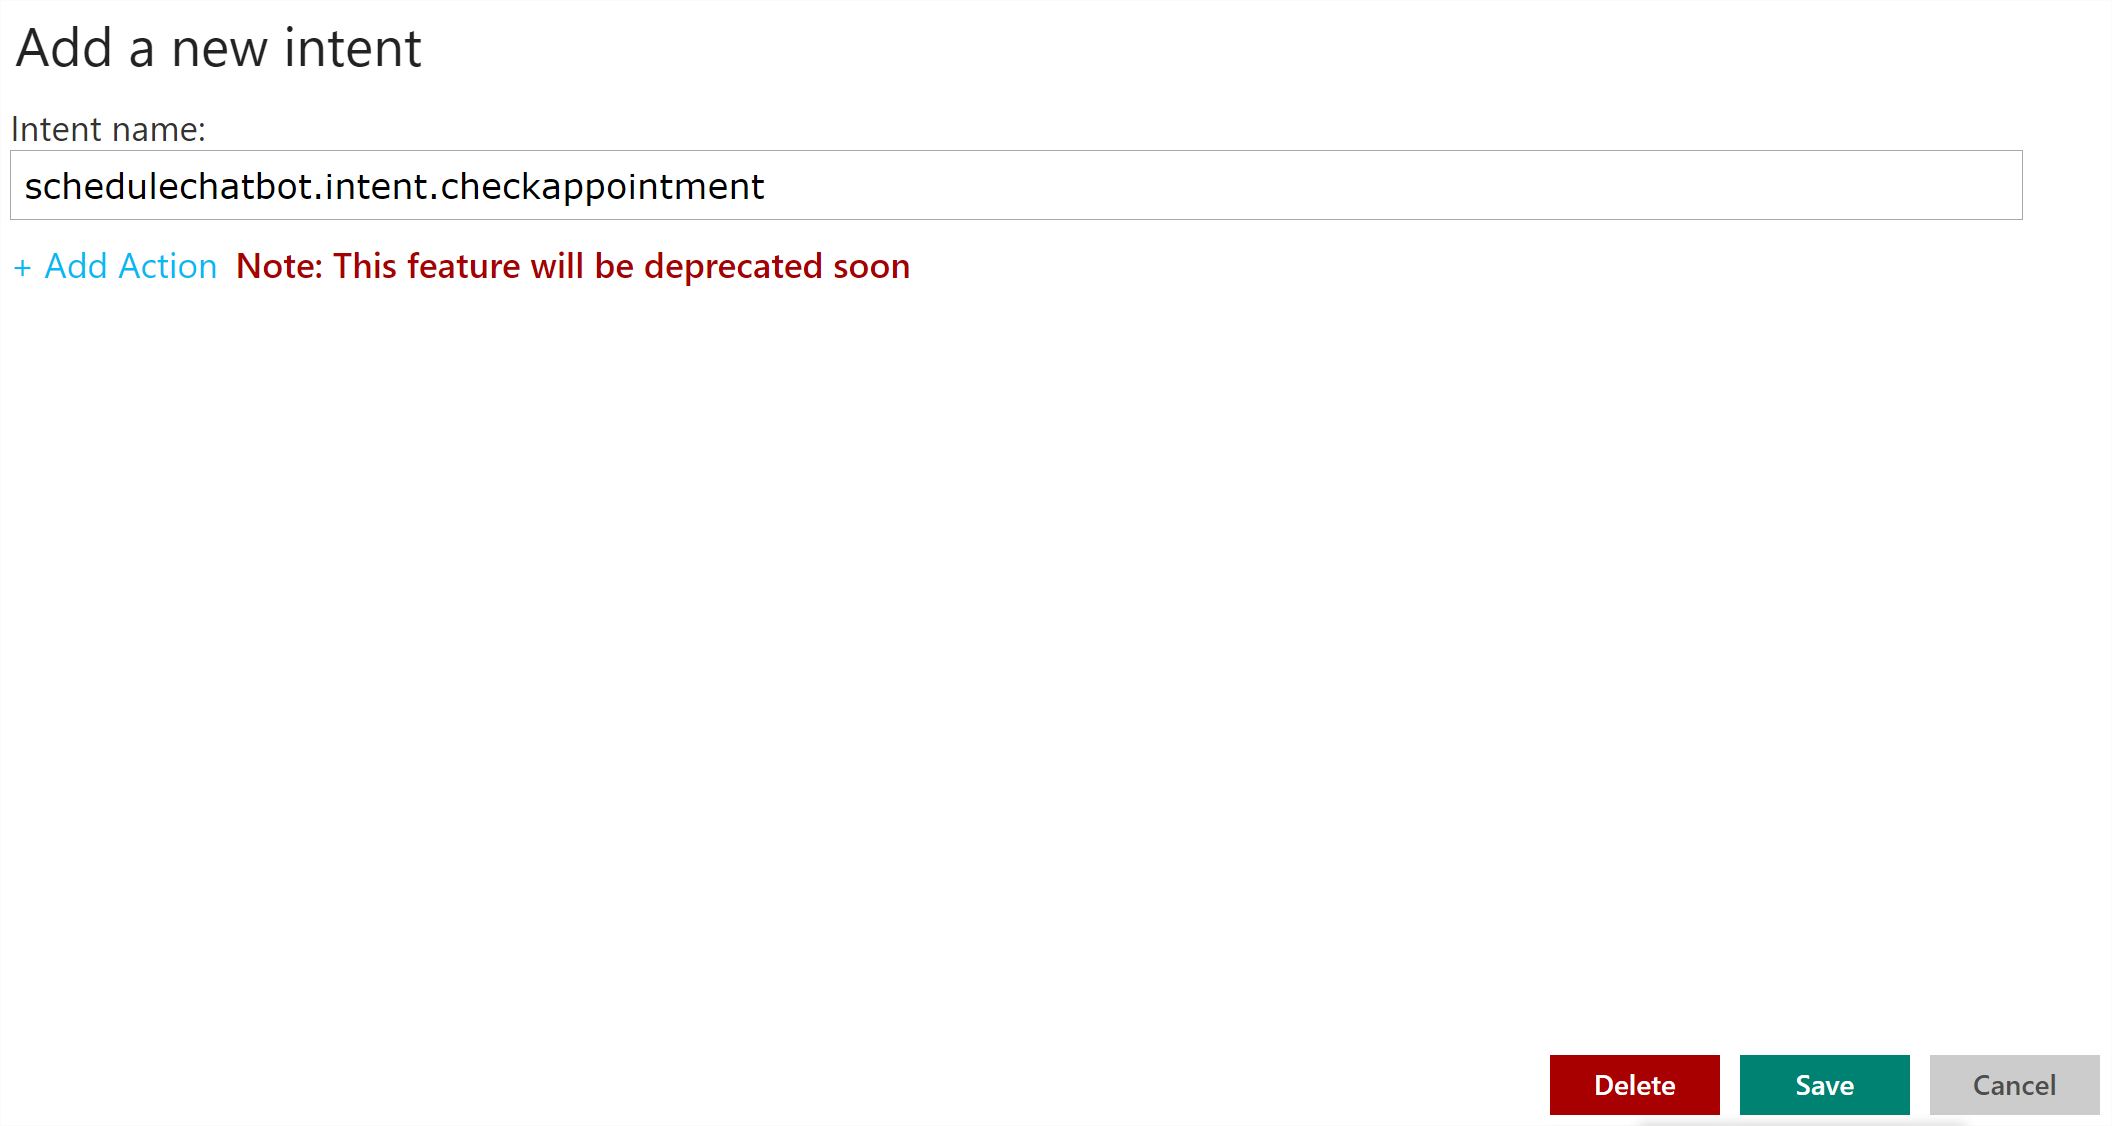
Create a new intent with a suitable name, I called mine "schedulechatbot.intent.checkappointment" because it effortlessly rolls off the tongue.
Next, we'll add an entity called "appointment" and a phrase list feature called "check appointment" with a sample phrase of "when is my appointment".
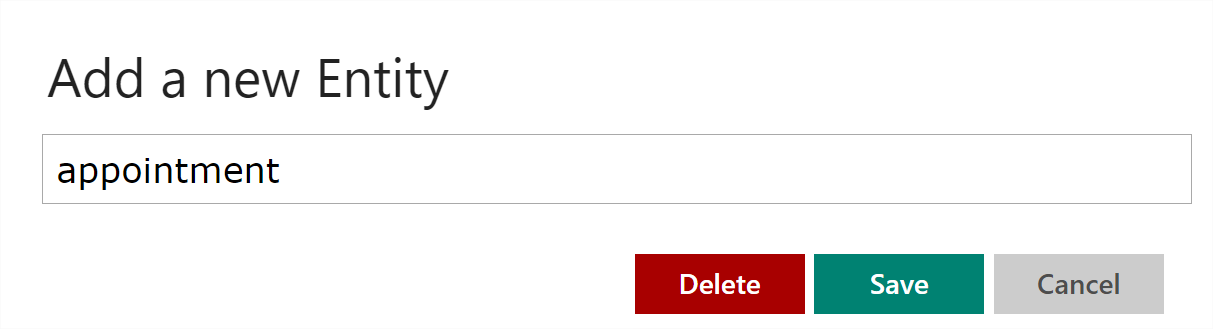
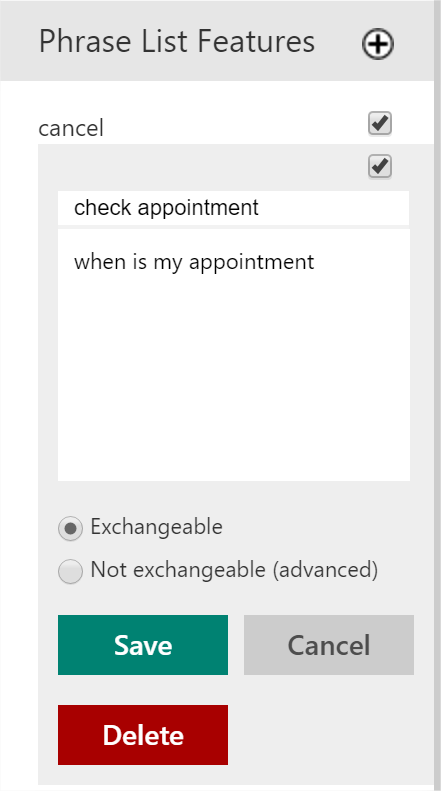
(^ Don't get me started on that UX.)
The phrase list feature will accept a comma-separated list of values that should match to the "check appointment" feature.
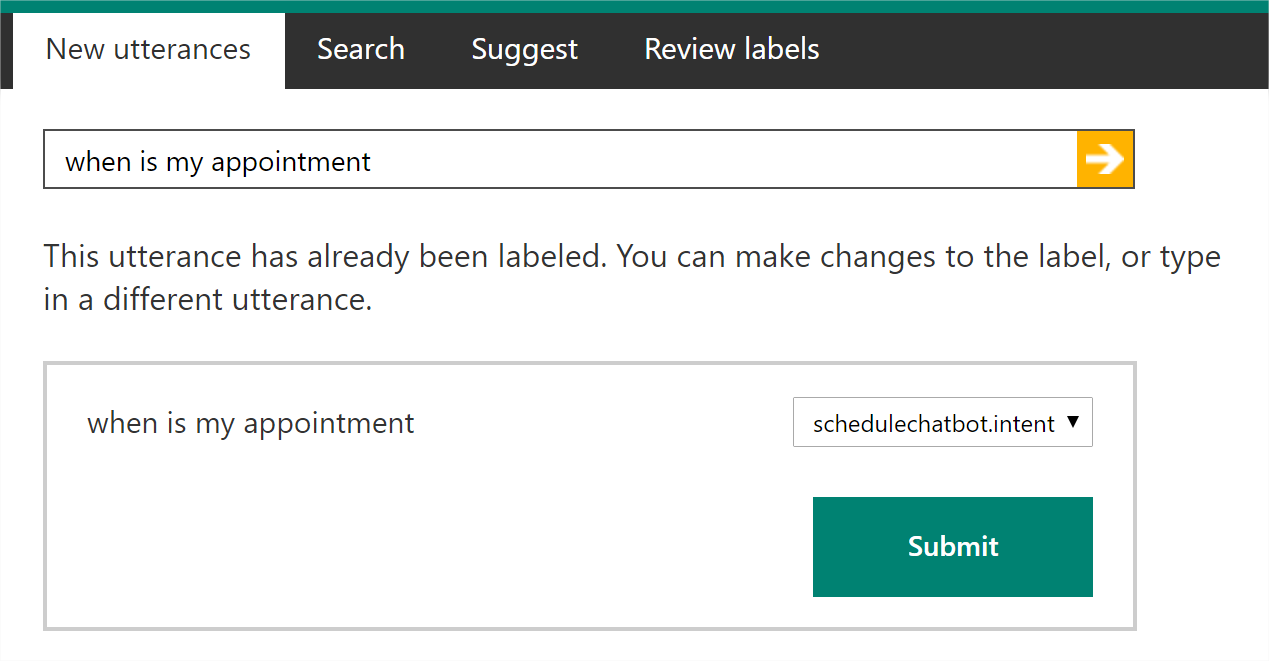
Once that's done, enter some utterances in the main area. This will give you an opportunity to see if the bot is able to correlate a particular phrase to your specific intent. If it is unable to understand your request to any of the configured intents, it will return the default intent of "None".
For this example, I simply entered what's in the phrase list: "when is my appointment". I have already labeled mine, but you'll want to make sure you label yours with the intent that you created and submit it. We'll check for this intent when wiring it up to our bot.
Enter in as many as you would like. Once you are done, it's time to publish your LUIS app.
To publish, make sure you have an endpoint key, which you can see in the App Settings section of the site. You'll have to buy one from Azure, but since it's currently in beta (as of this writing), it's free. Once that's done, take note of the "App ID" and the endpoint key values as we'll need them when configuring our LuisDialog for the bot.
Publish your app.
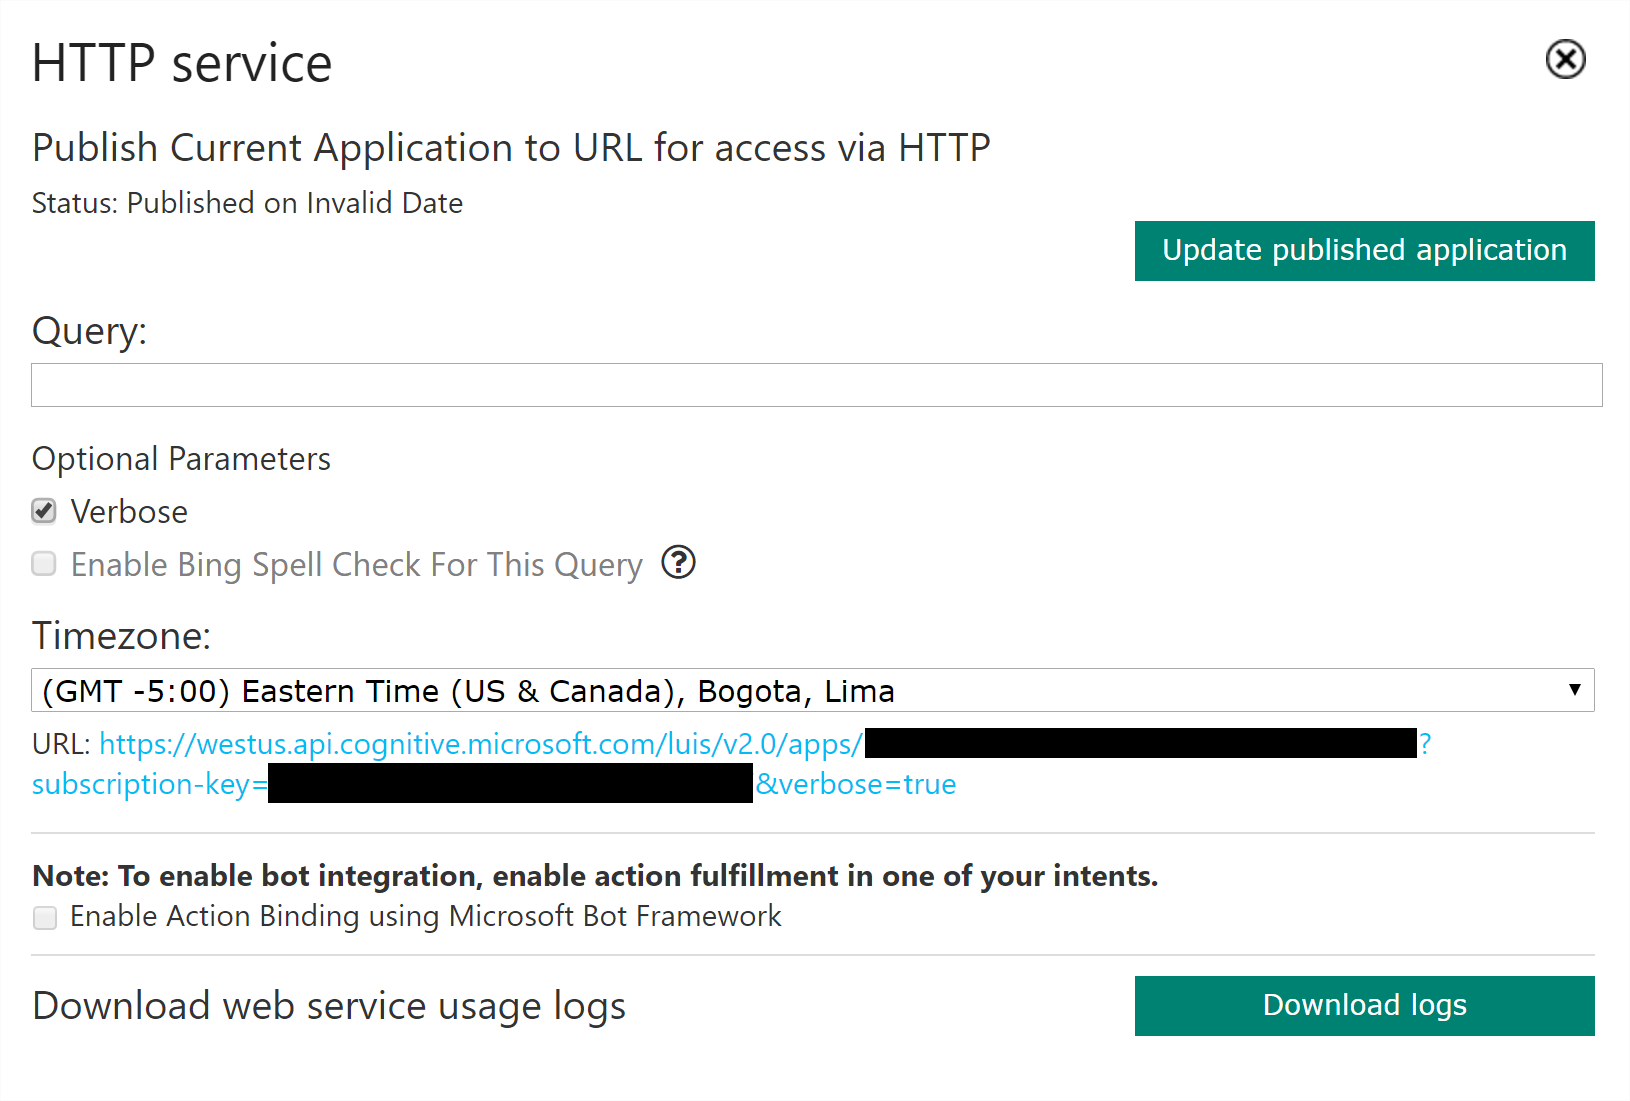
After publishing, go ahead and run a query that will simulate the request from our bot. You should end up with a JSON response similar to this:
{
  query: "when is my appointment",
  topScoringIntent: {
    intent: "schedulechatbot.intent.checkappointment",
    score: 0.9999995
  },
  intents: [
    {
      intent: "schedulechatbot.intent.checkappointment",
      score: 0.9999995
    },
    {
      intent: "None",
      score: 0.0622554161
    },
    {
      intent: "schedulechatbot.intent.reschedule",
      score: 7.661848e-7
    },
    {
      intent: "schedulechatbot.intent.cancel",
      score: 2.13430852e-7
    }
  ],
  entities: [ ]
}
The top scoring intent is the one that will automatically correlate to the one our bot is looking for. Depending on your application, however, you can deserialize this entire response and interrogate it as you see fit.
Now, let's switch back to our bot.
Let's create a brand new dialog called ManageAppointmentDialog that inherits from LuisDialog<object>. We'll need to decorate it at the class level with LuisDialog and the App ID and endpoint key we copied from our LUIS app. This tells the framework which app to use when it calls out to LUIS.
Your class should look something like this:
[LuisModel("appid", "endpointkey")]
[Serializable]
public class ManageAppointmentDialog : LuisDialog<object>
{
    private static string UserPhoneNumber = ConfigurationManager.AppSettings["UserPhone"];

    [LuisIntent("")] //none
    public async Task None(IDialogContext context, LuisResult result)
    {
        await context.PostAsync($"Sorry, I don't understand what you mean.");
        context.Wait(MessageReceived);
    }

    [LuisIntent("schedulechatbot.intent.checkappointment")]
    public async Task CheckAppointment(IDialogContext context, LuisResult result)
    {
        var appointment = await RestApiClient.GetAppointmentByPhoneNumberAsync(UserPhoneNumber);

        if (appointment != null)
            await context.PostAsync($"Your appointment with Dr. {appointment.Therapist.LastName} is on {appointment.AppointmentDate.ToString("MM/dd/yyyy")} at {appointment.AppointmentDate.ToString("hh:mm")}{appointment.AppointmentDate.ToString("tt")}.");
        else
            await context.PostAsync($"Appointment not found for phone {UserPhoneNumber}.");

        context.Wait(MessageReceived);
    }
}
A couple of things:
- We'll set the user phone number to a default value for now, to simulate getting the number from the user.
- The empty LUIS intent will be used whenever LUIS assigns the default "None" intent. For our case, we're simply telling the user
¯\_(ツ)_/¯. - The other intent matches the intent in our LUIS app. The top scoring intent will get mapped here and used.
- The app calls the schedule system API to get the user's phone number and echoes back their appointment information (if they have it). We post the response back on the context and then we tell the bot to wait for another message.
The last thing we need to do is wire up our dialog to our MessagesController.cs.
Modify the default method:
public async Task<HttpResponseMessage> Post([FromBody]Activity activity)
{
    var connector = new ConnectorClient(new Uri(activity.ServiceUrl));

    if (activity.Type == ActivityTypes.Message)
    {
        await Conversation.SendAsync(activity, () => new ManageAppointmentDialog());
    }
    else
    {
        HandleSystemMessage(activity);
    }
    var response = Request.CreateResponse(HttpStatusCode.OK);
    return response;
}
We're telling our bot to invoke a new instance of the ManageAppointmentDialog we created whenever we receive a message. Let's fire it up and see what happens.
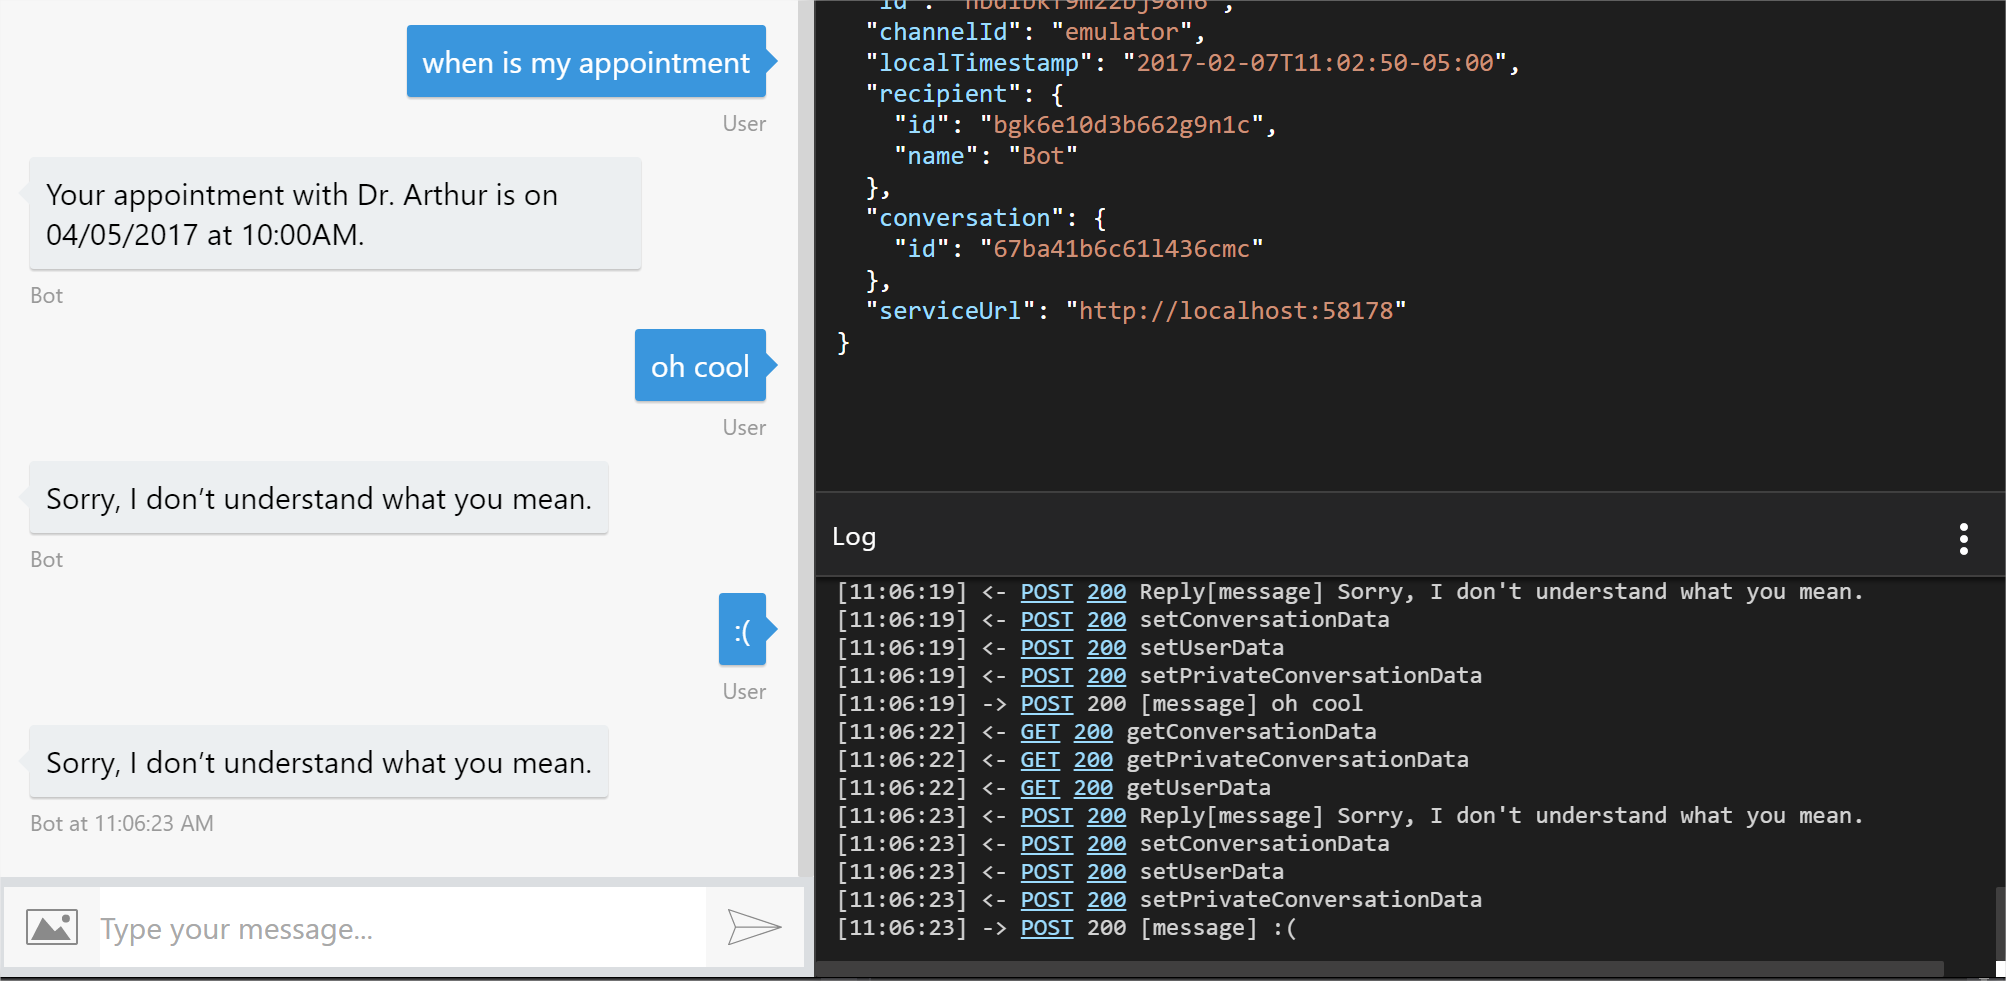
Neat. You can see that some of the responses aren't mapped, which get assigned to the default intent of "None" to which our bot responds with "Sorry, I don't know what you mean."
In the next post, we'll implement another feature and make our bot a little more user friendly.