Getting Started with the Microsoft Bot Framework (Part 1)

It's been a while since Microsoft's Build 2016 conference when they announced their open source framework for developing bots. At the time of this writing, it's evolved to include new some new features and bug fixes.
This will be a brief series of posts that look at getting started with your development environment and building a simple bot that takes advantage of LUIS to interpret user input.
Use Cases
Before we run out the door and start building things, let's look at some use cases for what solutions a bot implementation might provide.
Remember, a bot is simply a piece of software that provides some automation capability, typically with common tasks that can be user driven, like compiling the options for an order or making schedule arrangements based on a set of criteria. The number of ways that users may choose to interact with a bot -- via text, Skype, Slack, a custom javascript plugin, phone -- make the implementation attractive if you engage with users across multiple channels.
The automation of repetitive tasks may also be attractive as you may be able to augment your staff to provide hands-on support for special cases. For example, a bot may provide a quick an easy method for a busy user to retrieve a report by simply asking "I need the widget report for client X from 2014 to 2015" instead of having to navigate to a reporting tool to retrieve or build the report themselves, or even worse, calling to talk to a person to retrieve the report on their behalf.
Depending on what you have in place, you may find that a bot may offer a new way to interact with existing systems that have been built. If implemented properly, existing systems can be enhanced with additional capabilities that may breathe new life into a mature system.
No matter the use case, a bot is nothing more than another tool in the toolbox. You can expose an automation facility to enable self service capabilities to users, but neglecting the user experience may cause them to continue their current methods. Who wants to answer 37 questions via a chat-style Q&A bot that has to ask What do you mean? or You selected X, are you sure?
The Scenario
So let's talk through an example. We'll keep the situation simple, but try to illustrate at least some semblance of a "real world" scenario in a toy-like implementation in order to get used to the concepts.
We have an existing system used to manage a therapist's patient schedule in an outpatient facility. It's not very fancy, but it gets the job done. The receptionist splits her time managing the schedule and other duties. All of the patients have mobile devices.
Since all of the patients have mobile devices, we can build a simple bot that is capable of looking up a patient's next appointment, cancelling their appointment, and rescheduling their appointment. The bot will integrate with the existing scheduling system.
Since this is a toy implementation that walks through the Microsoft Bot Framework, we won't concern ourselves with HIPAA compliance or advanced security measures.
Let's Get Started
This example will be done using Visual Studio 2017 RC and C#. SQL Server Express 2014 will hold our database.
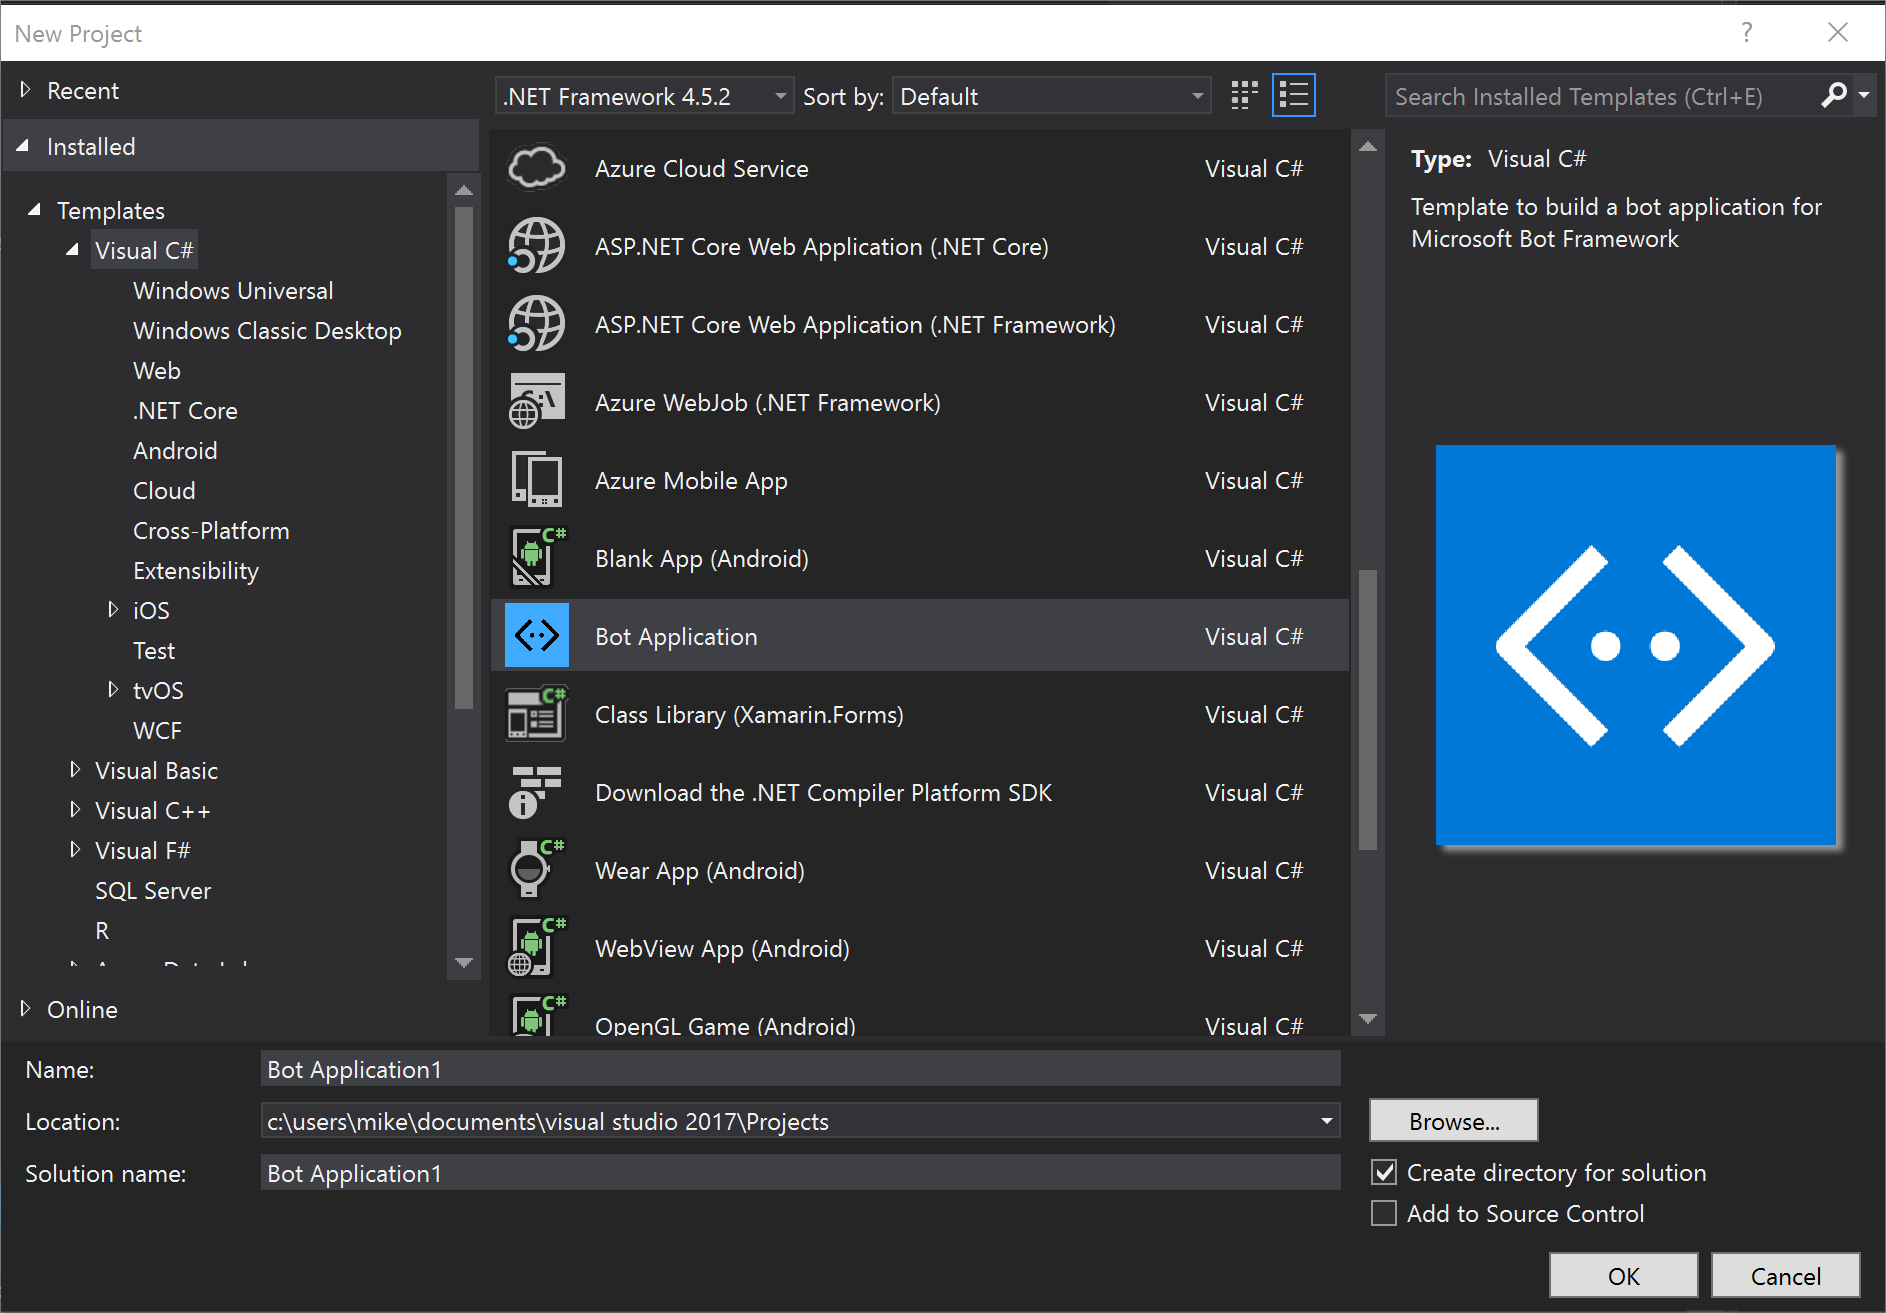
1. Get the Template
Since we're using Visual Studio for this example, we'll want to download the template to help make our lives a little easier: http://aka.ms/bf-bc-vstemplate
Unzip the file into your templates directory, located here: %USERPROFILE%\Documents\Visual Studio 2017\Templates\ProjectTemplates\Visual C#\
For me, it's located here:

For different versions of Visual Studio, adjust the path accordingly.
2. Get the Emulator
We'll use the emulator to test out our bot locally, which is pretty handy.
Download it from here: https://aka.ms/bf-bc-emulator
Install it wherever you like.
3. Open a New Project
Once those two steps are done, go ahead and open Visual Studio and create a new project using the project template that we just installed (NOTE: This example is using .NET Framework 4.6.2).

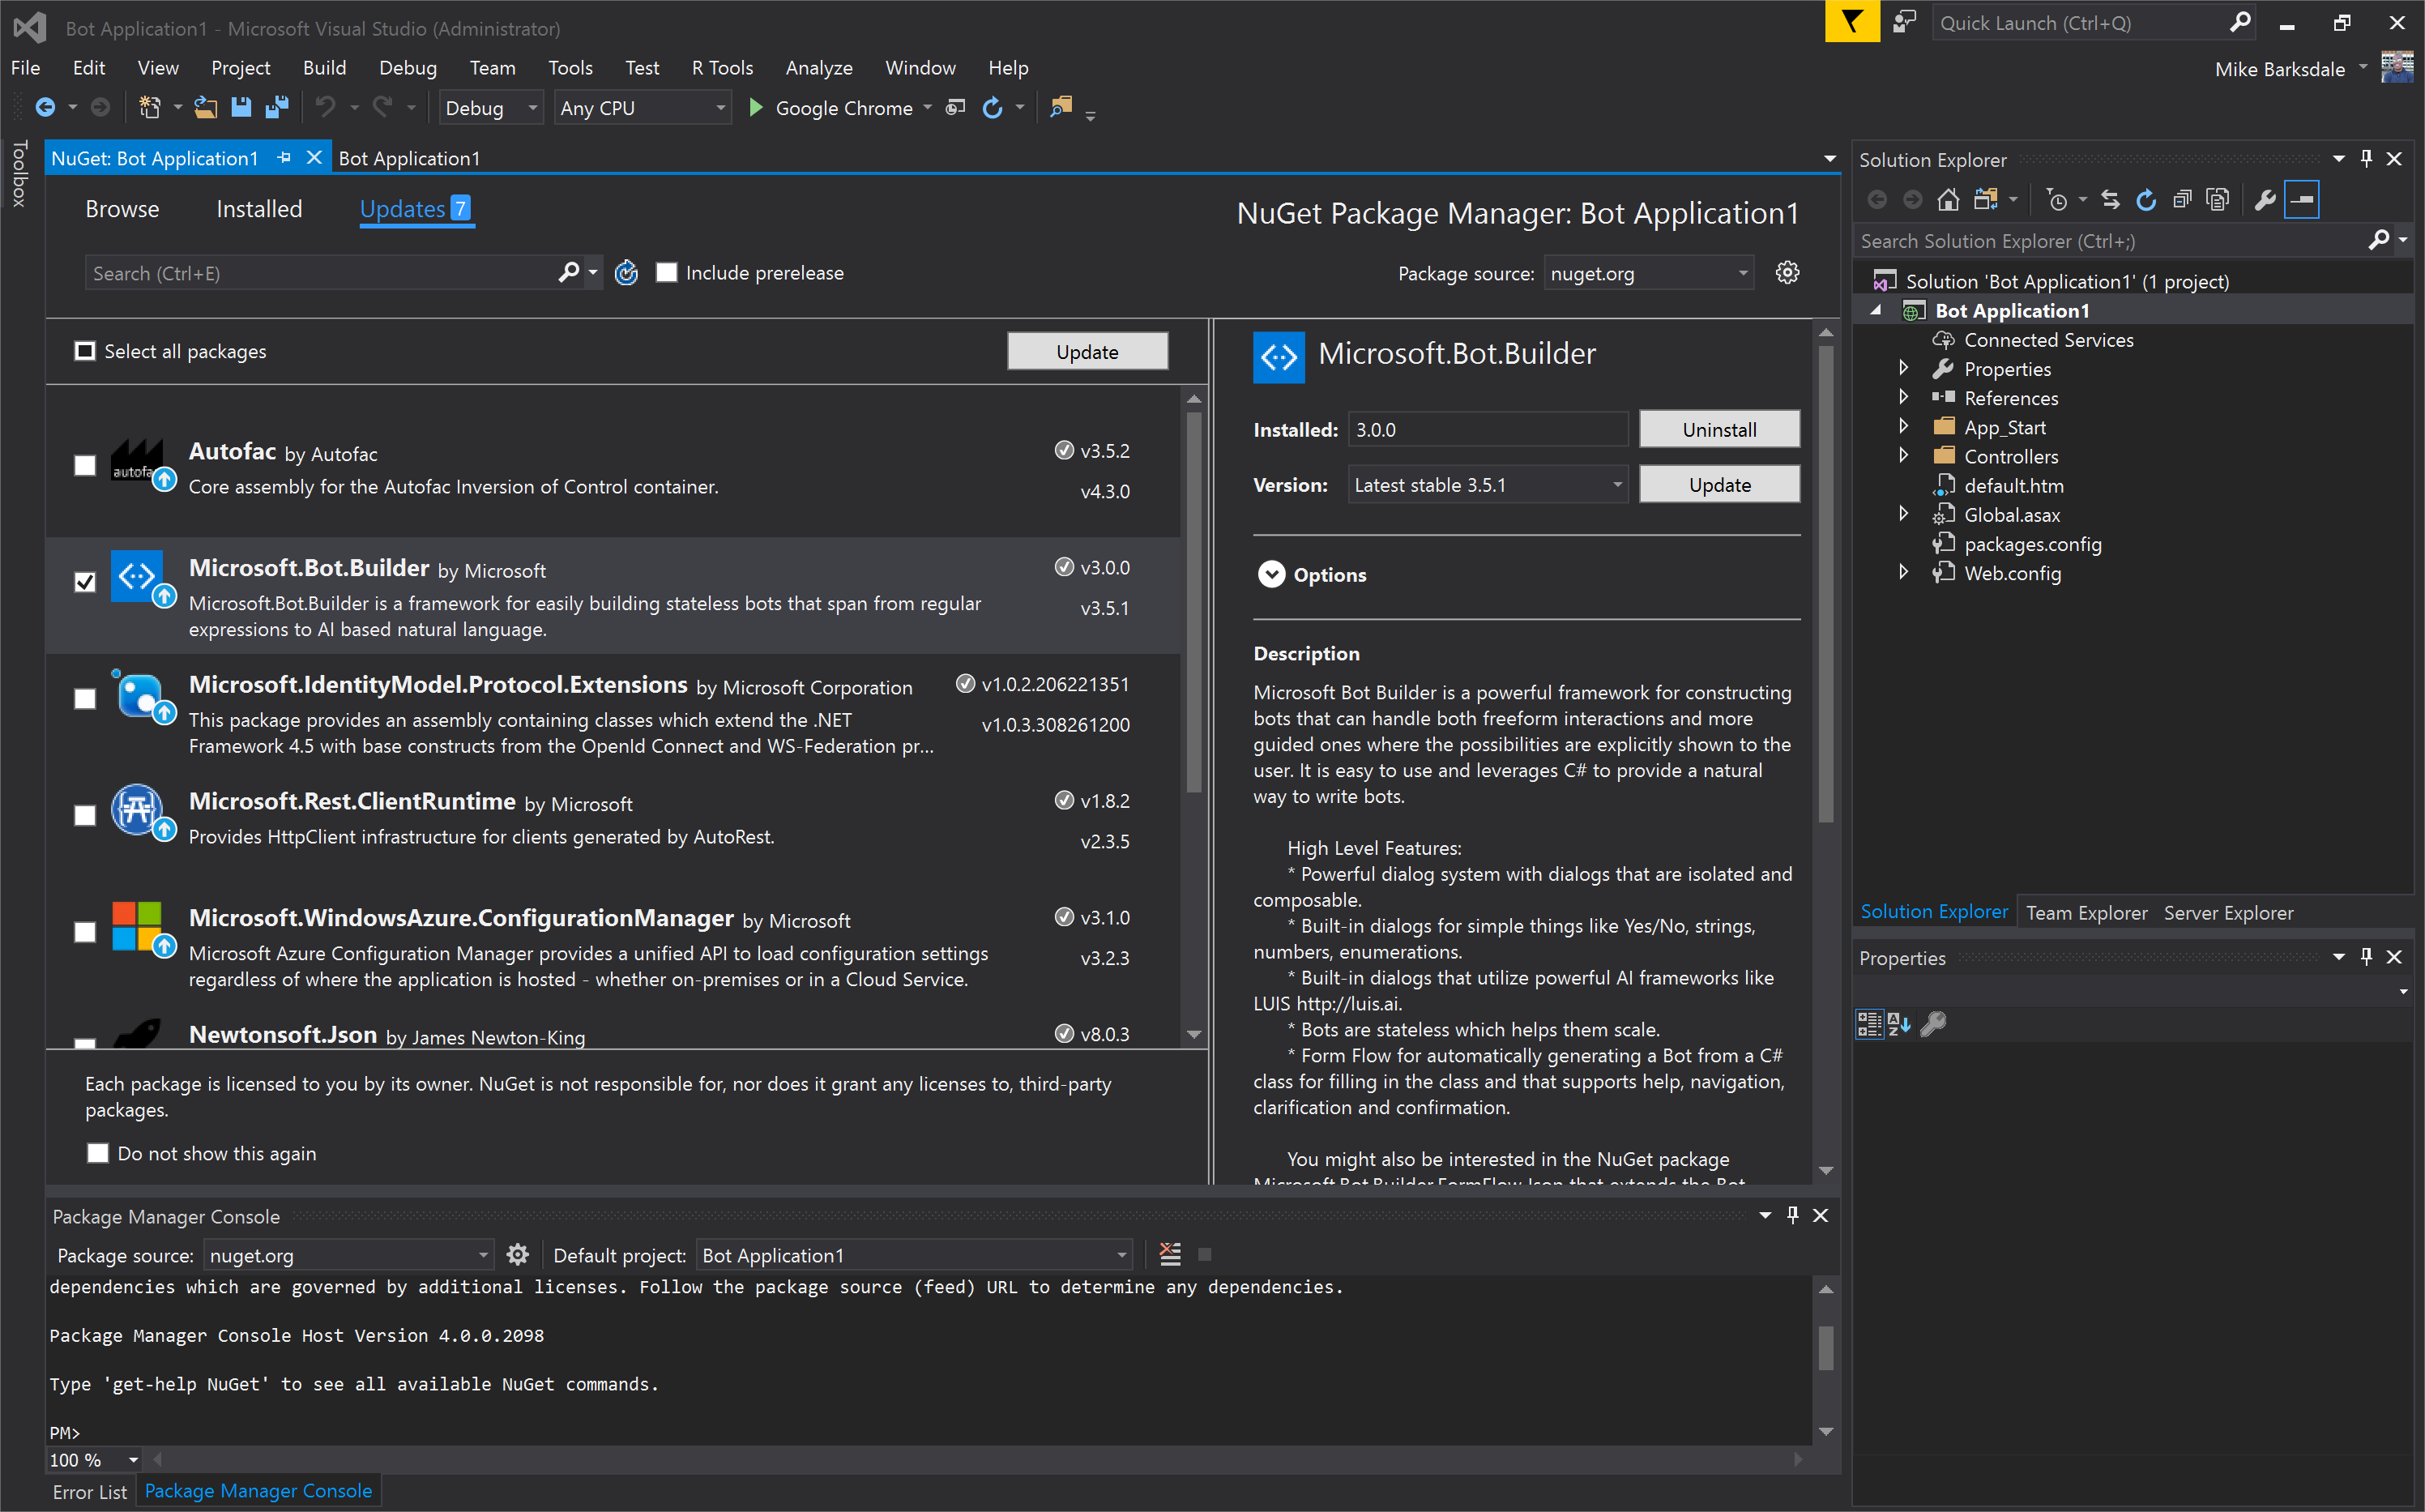
Once the project is opened, we'll need to update the bot builder to the latest version (which is 3.5.1) via NuGet. Feel free to use the command line or the GUI. Below is a screenshot of the GUI:

You can also update the project properties to the framework version of your choice. This example will use 4.6.2.
And for good measure, give it a build.
4. Give it a Whirl
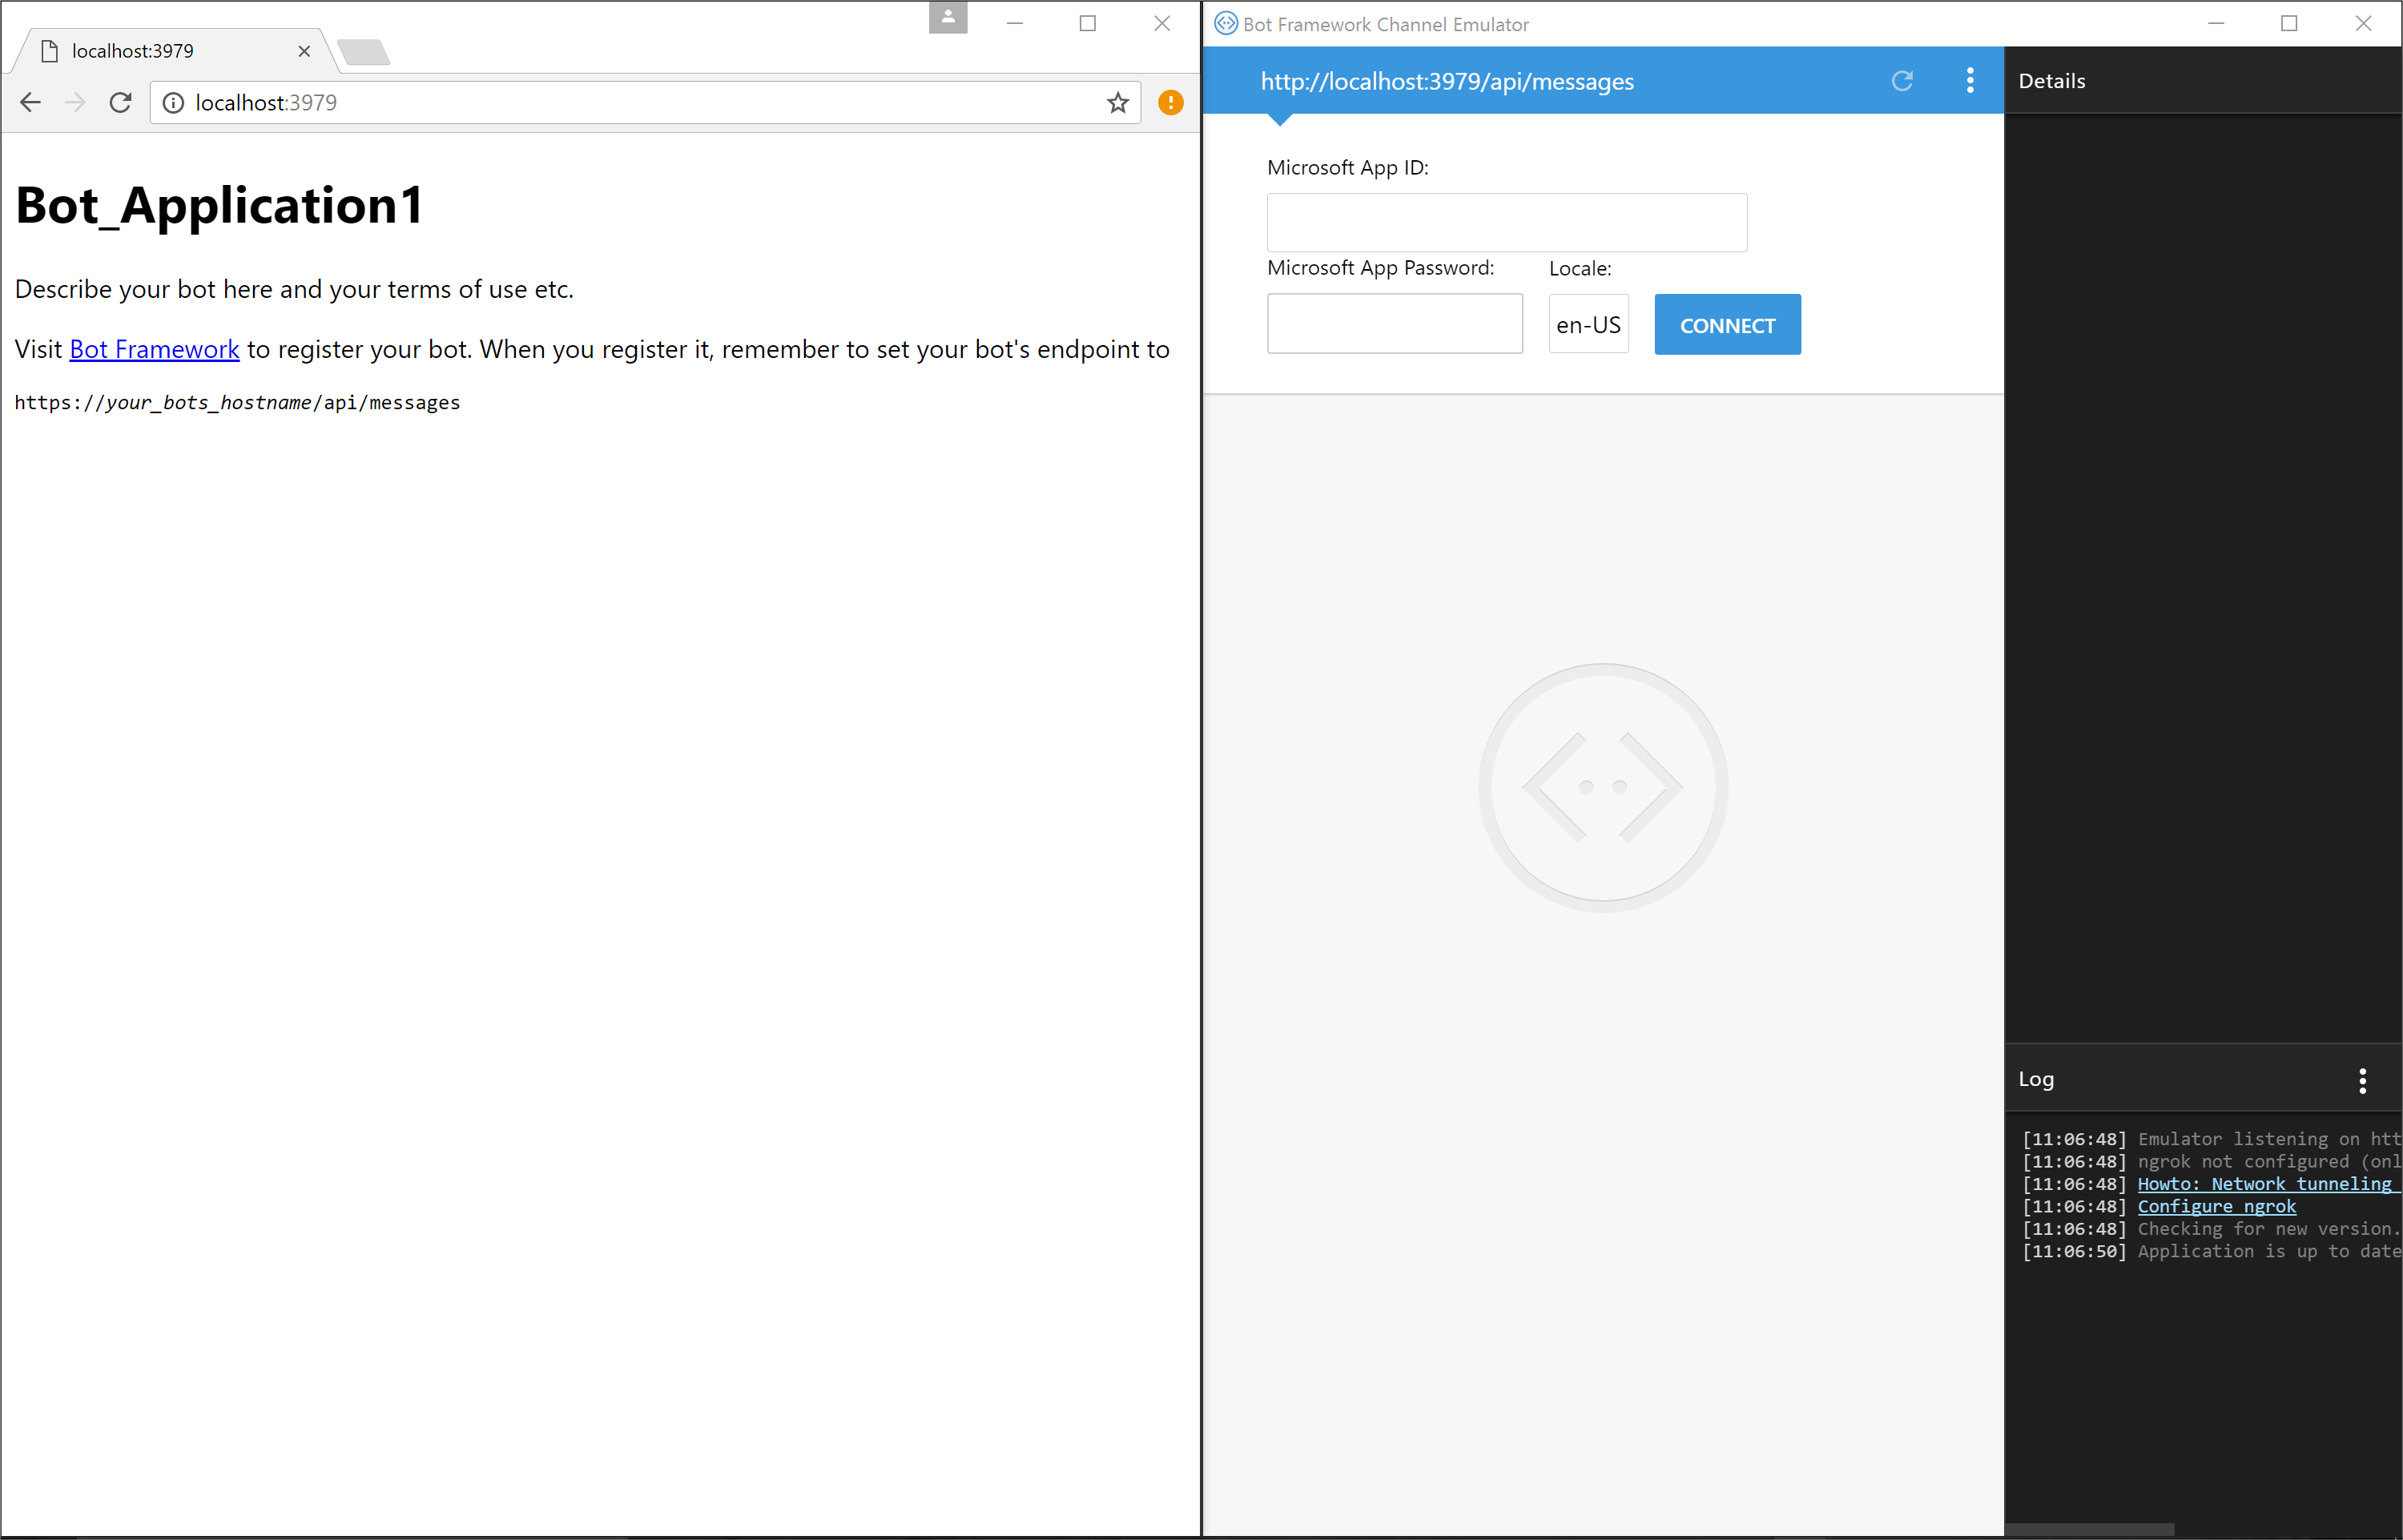
We'll take a look at the default code in the next step, but let's go ahead and complete our connectivity test. Fire up an instance in debug mode and take note of the URL and port.
Once it's up, start up the emulator -- and let it complete an update, if one's available -- and point it to the URL and port you're instance is listening on at the api/messages route (e.g. http://localhost:3979/api/messages).
Once they're up, you should see the following:

Since we're running this locally, we don't need to enter a Microsoft App ID or password, so just hit "Connect" on your emulator.
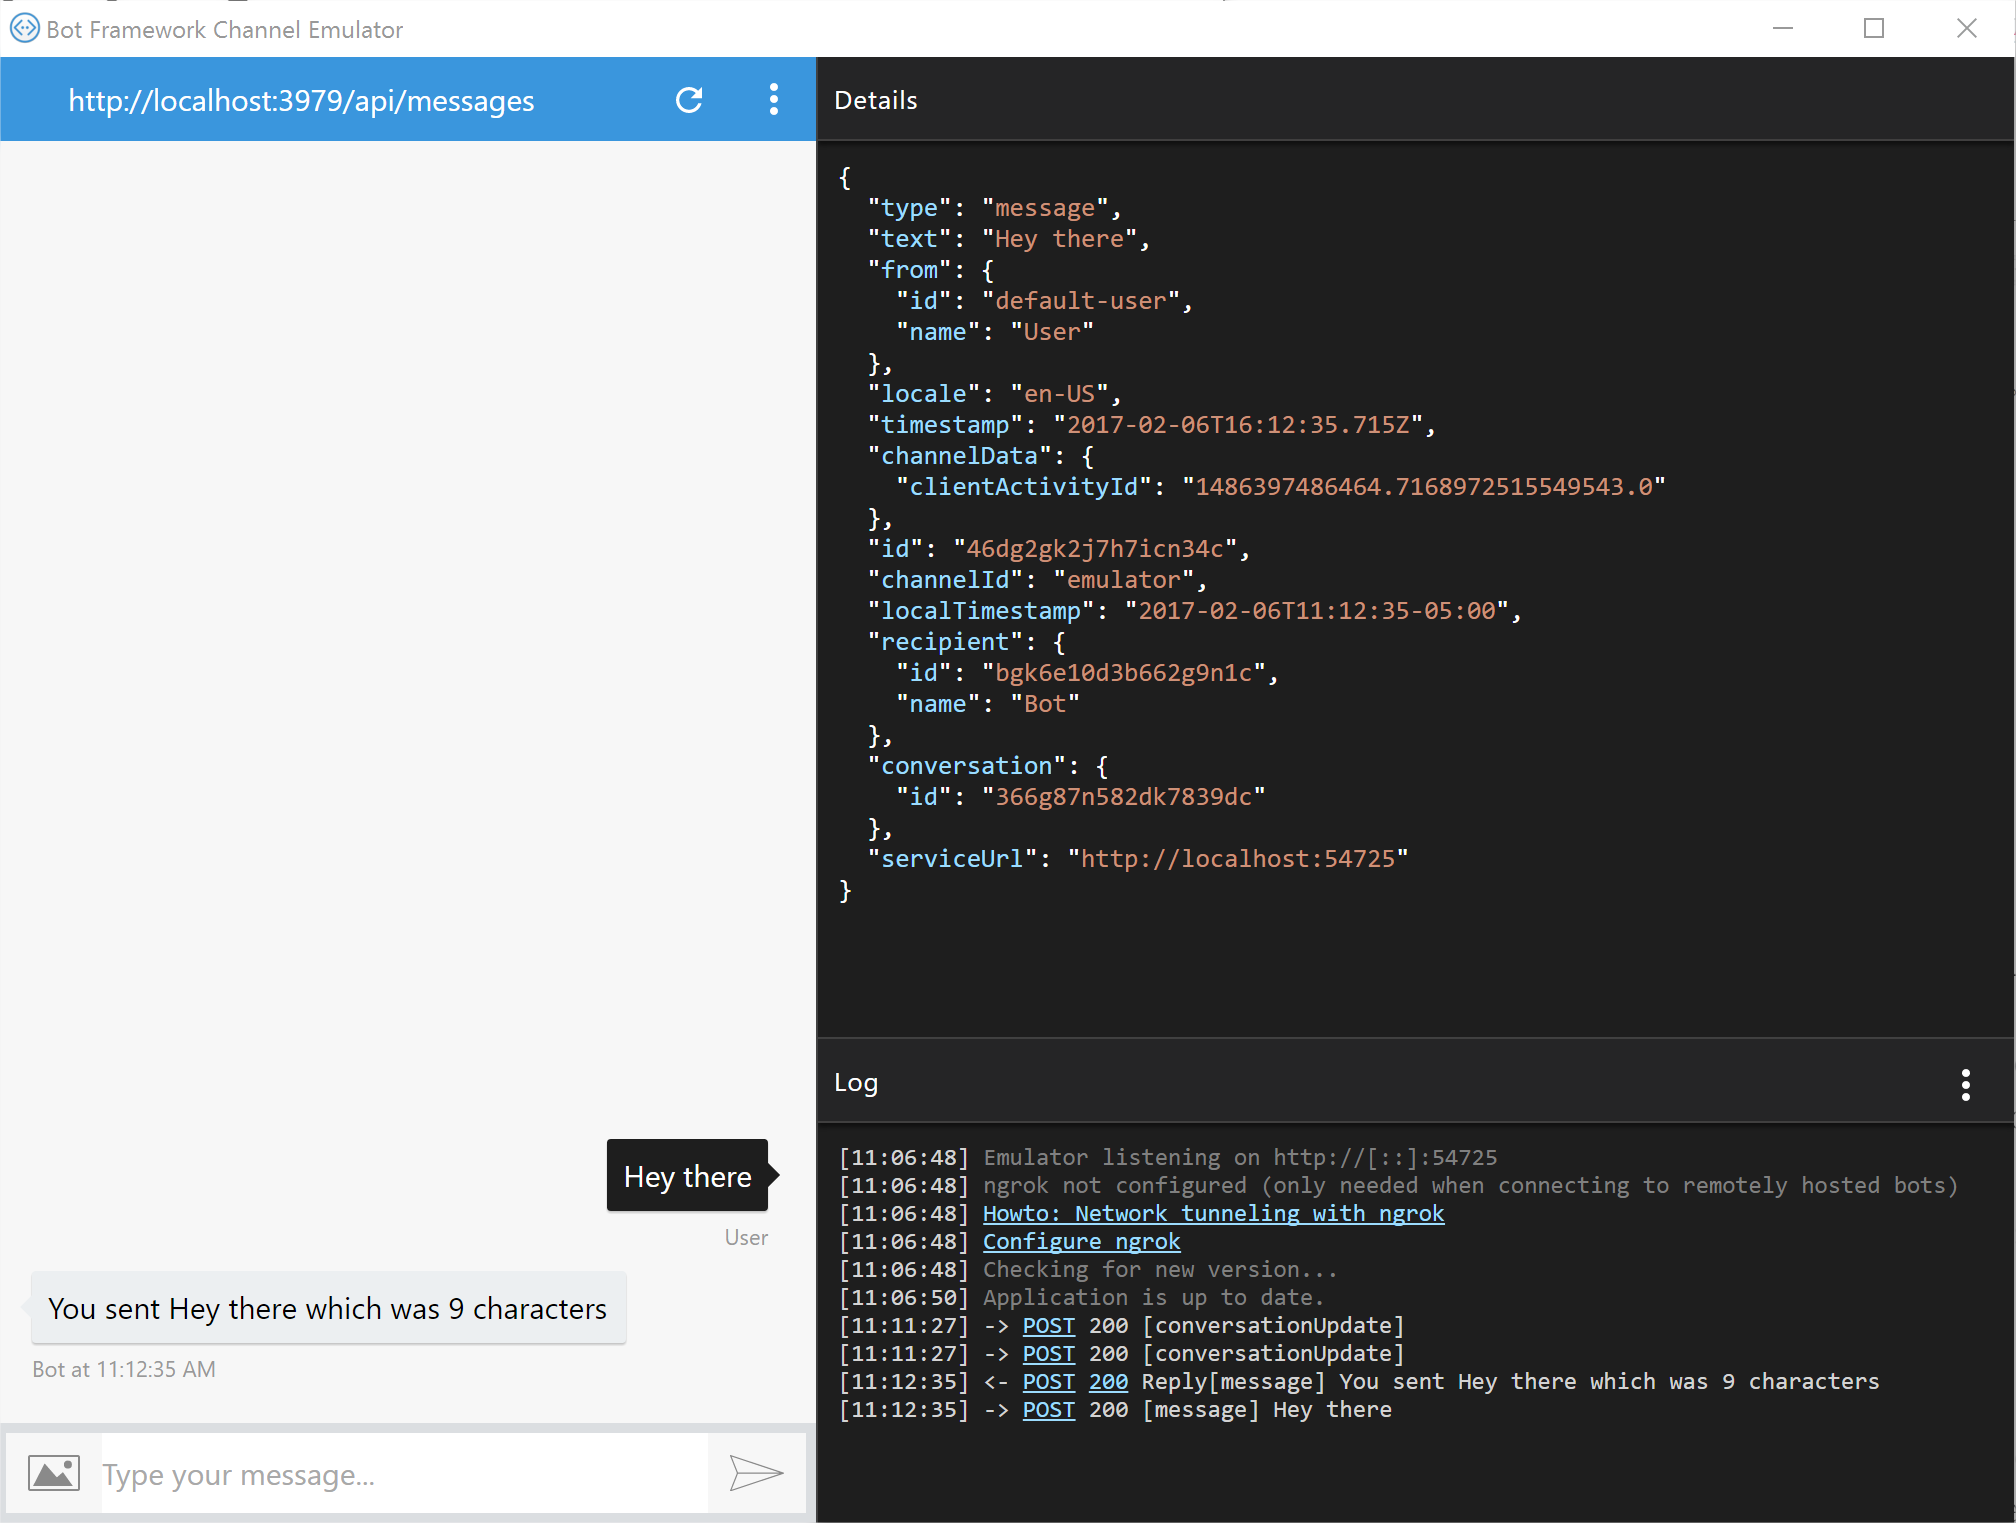
After that, you'll be treated to a messaging interface. Go ahead and enter a few things (don't forget to take note of the "Log" in the lower right hand corner).
You should get a successful echo back with the number of characters that you entered. If you click on a message or the highlighted text in the Log (either sent or received), you'll see its JSON output in the "Details" pane (which is useful when debugging):

5. What's Going On?
Jump back into Visual Studio and let's take a look at the code. Open up MessagesController.cs. There's a Post method that accepts an Activity and interrogates its type.
The framework handily wraps this up for us and gives us a connector that corresponds to the channel the message came in on (in this case, the emulator). You can see in the screenshot above it's connecting back to the emulator's serviceUrl of http://localhost:54725.
After that, it simply takes the message, calculates the length, and returns a response. The response is returned back to the emulator via a reply off of the Conversation that the framework created for us.
There are other types of messages as well, which you can see in the private method HandleSystemMessage. We'll use one of these in the upcoming example to give our user a nice welcome message.
Coming Up Next
You've got the example up and running on your machine now. Feel free to make modifications and play with it in debug mode to see how it works.
In the next post, we'll do the following:
- Expand on our use case by stubbing out a sample "Schedule System"
- Discuss dialogs
- Implement a "check appointment time" bot response
